Wednesday, December 26, 2012
New Years Resolution
This year my husband and I have decided that we will have two resolutions one will be to workout, like we used to do before the newest addition to the family. The other is to not eat fast food for the entire month of January. This may not seem like a stretch for some people to do, but we will have to work harder to make sure this happens. When you break down the cost associated with us eating out for two at lunch during the week while we are at work, we spend an average of $20 a day. Yeap a $100 a week, some weeks I'm sure are less and some are more depending on where we eat. The hard part with this is that we work in a mechanic shop. We do have a small fridge there and can bring a crock pot to keep food hot in. There is also a microwave available to us, although I do not like to use them. We also average eating out with the family at least once a week for dinner, which can add up to $60 bucks if we are not careful, sometimes we can get away with $30. We also have a breakfast we sometimes splurge for, which ends up around $15 to $20 bucks every week or every other week. Pretty sad huh? So in just one week we could spend almost $200 in eating out. We want to stop this, and we are going to. I am very determined to make sure and have a few things on hand for eating and quick meals. Like bread, canned beans or stew, trail mix and peanut butter. All of which I will make or can. I am going to start making breads on the weekend and trail mix. I can usually make enough peanut butter to last a good week or so pretty fast, so I can make that whenever. I will also try and keep everyone updated so that we can share recipes and let you know how this is going for us. It wont be easy, and maybe sometimes I should except that I cant always make homemade bread or what not and buy it at the store. We received a super wave oven as a Christmas gift and I am excited to use it to make cooking faster, or at least that's what the book says it does. I am interested in trying new recipes also as ours have been on repeat for a while. What recipes are your favorites for a quick meal? How do you keep in budget and not eat out so much?
Thursday, November 1, 2012
Chili Mac

I like quick filling meals, I also love chili. On days when time is short but I want chili I make chili mac. Its easy, simple and could easily be a one pot meal. I boil the noodles separately though, so for me its a two pot meal. My Mom used to make something like this for us growing up but called it Slop. Whatever you call it, its good, warm and I don't usually have lots of leftovers. Here is my recipe:
Chili Mac
1 or 2 pounds of hamburger meat or venison
1 onion diced
Garlic
Elbow noodles (or noodles of choice)
1 can of tomato's diced or crushed
2 cans of tomato sauce
1 or 2 cans of beans ( I use ranch style or pintos, but I rinse the pintos)
1 can of corn (optional)
Chili powder (to taste)
Cumin (to taste)
I cook the hamburger meat with the onion and garlic until done. While I do this I cook the noodles. I make sure the pan I cook the meat in is big enough to accommodate everything. When the meat is done, drain and add tomato's, tomato sauce, beans and corn (if adding), cook over a medium heat. When the noodles are done add them too, stir well. Add chili powder and cumin powder until desired taste is achieved. For me it takes very little cumin, but lots of chili powder. Cook this together for a bit and taste again, it always seems to me that the taste changes a bit and I have to add more things. Some people might be taken back by adding the corn, but it is awesome. You can also add the corn in with the leftovers the next day to make them go farther and eat it plain the first night. I like to serve this with corn bread. The taste will seem more like homemade chili if you use plain pintos rather than ranch style beans, but it is great both ways. If you want you can cook your noodles in the pan with the meat, you might just have to add a little water.
Monday, October 29, 2012
Halloween fun
I made a two different treats for the cake walk at cub scouts. I made spider web cupcakes and finger cookies. To make the cupcakes I used a regular box cake mix and frosting. I baked it according to the directions on the box. When cooled I frosted them lightly, mostly just enough to cover the cake.

Make sure you smooth it out kind of good. Then take some of your frosting and put it in a bowl and mix it with black food coloring until it is the desired color.

Put this colored frosting into a piping bag or a zip lock bag I grab the corner I want to cut and push it through the inside of the bag, and fill my hand up with frosting. Then I pull my hand back through and the frosting is just in the corner and not all over the bag.

I could not get a good picture of the frosting in my hand since I was taking the picture myself. Next clip a tiny, tiny piece off the corner of the bag. With your piping bag make a small circle in the center of the cake and a bigger circle around it.

I only do a few cupcakes at a time, because I get bored easy and I need to keep changing what I am doing. Anyway, once you get some done you will need a toothpick or in a pinch a skewer. I hadn't realized we were out of toothpicks until it was too late. Next take your toothpick and start at the center line drag the toothpick through the black icing connecting the lines and going past the outer line. I usually make 5 or 6 lines on each cupcake.

This is when I realized I had made the lines too thick. I had to use the other corner of my bag and make the hole smaller. Next after the web is made you take an m&m and put it some where on the web. Using the black icing make little legs off the sides of the candy.

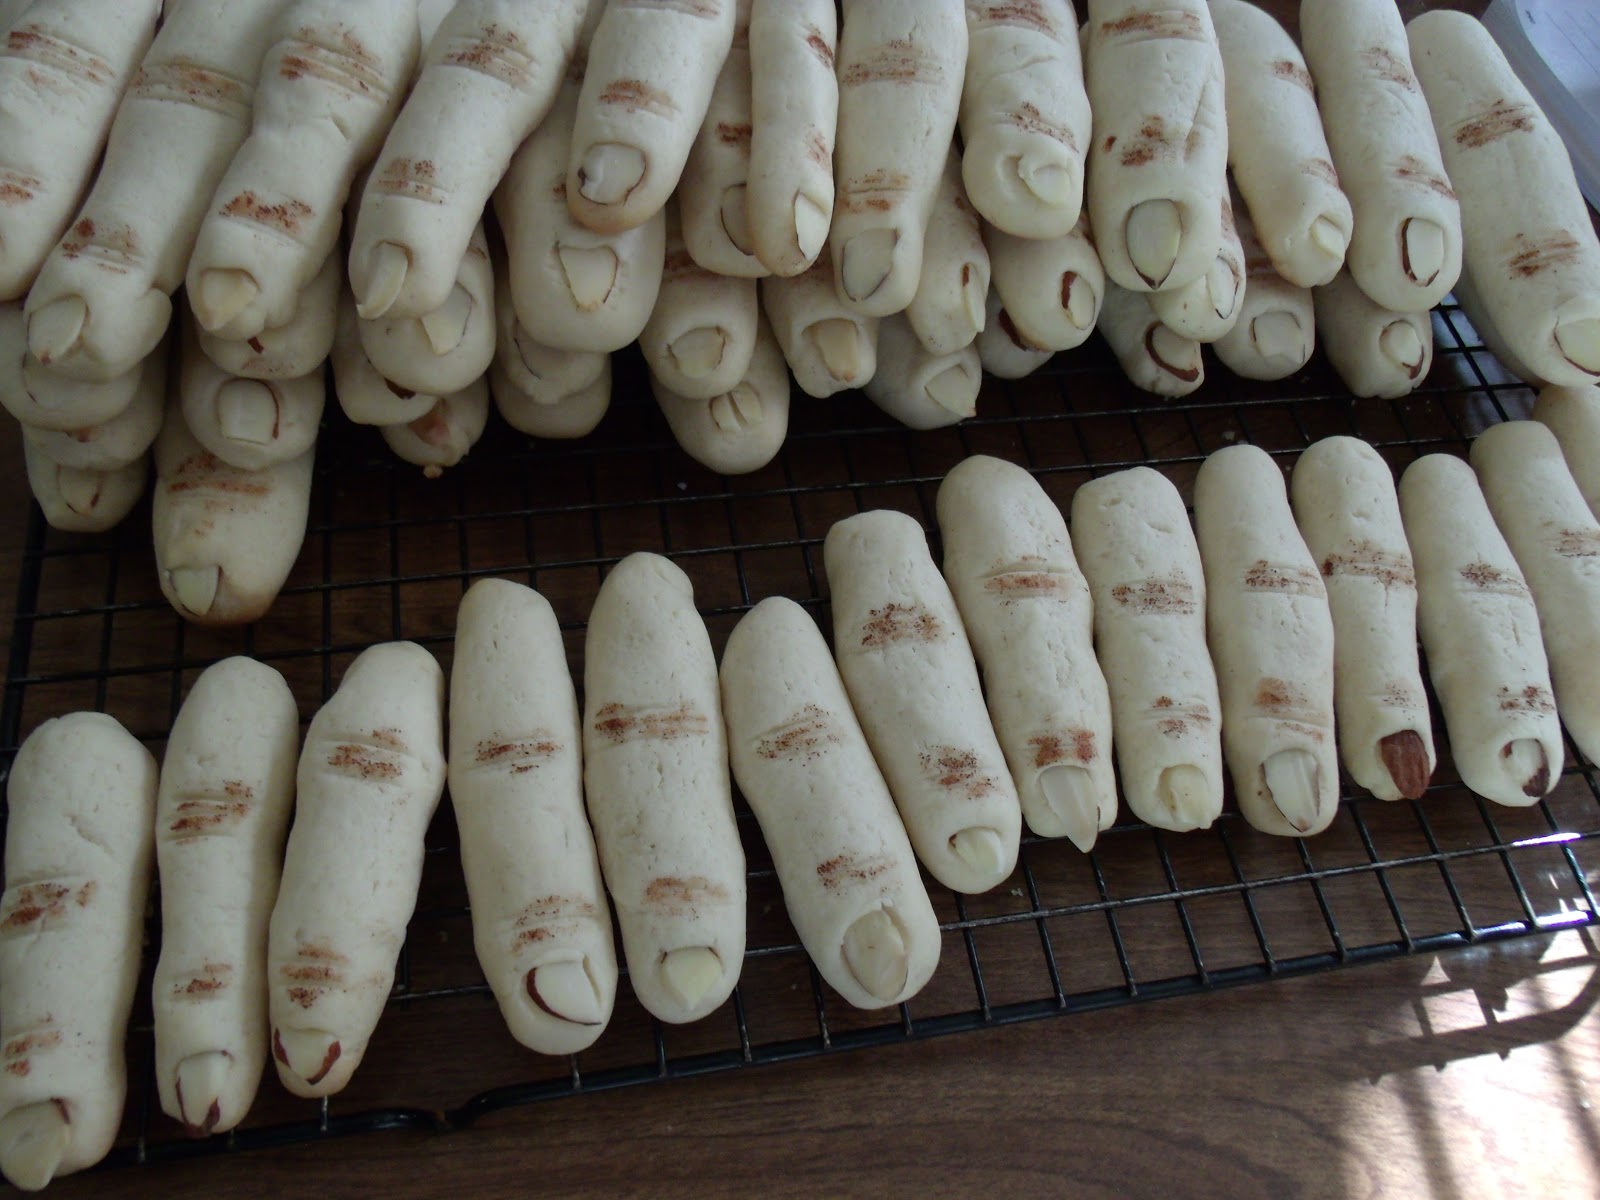
Next up we made sugar cookie fingers. I used the same recipe I have used before and you can find it here. After the cookies chilled we rolled them out like a snake and used sliced almonds to make finger nails. I used a butter knife to make the slits on the knuckles. After the first pan was out of the oven we realized we used too much dough. Our cool fingers turned into fat fingers. So we made them skinny almost boney looking and they turned out better.

I also dusted cinnamon over the slits, they look pretty awesome and I hope the boys like them at scouts. Whats your favorite halloween treat?
Tuesday, October 9, 2012
Stuffed Jalapenos
I love spicy food, so much that I grow at least two jalapeno plants every year. I love tabasco peppers too, oh and banana peppers. Anyway, before an impending frost I picked and the large ones. I have been letting them get to a big enough size so we could stuff them. The recipe I use is simple and I don't know who originated it, it was told to me a long time ago. I didn't get as many pictures as I'd like, but I got the one that show how to cut them. Always make sure you wear gloves, and I recommend a well ventilated area too. These were so spicy just cutting and de-seeding made me cough.
Stuffed Jalapenos:
Ground meat- cooked, drained, and cooled slightly
Cream cheese- warmed up a bit
Bacon
Jalapenos
Toothpicks
I didn't put an amount because it all depends on how many jalapenos you get. We had about 14 or so and used a pound of ground meat, one package of cream cheese and two packages of bacon. Rinse the jalapenos cut a slit down the center length wise, not cutting through the pepper. Make a horizontal slit at the top and bottom of vertical slit, making sure not to cut through the pepper again. Its ok if you accidentally chop through it, you can finagle it and wrap the bacon so it holds on most occasions. Gently pull your sides open and cut out seeds and membranes, or leave them in up to you. You get more stuffing in without it though.

Cut open and ready to stuff.
This is the only picture I got, but it shows you how I cut mine open. Ok once you have them cut open I rinse to get out any extra seeds that may be hiding. Mix your cream cheese and browned ground meat until smooth. It works best if meat is warm and cream cheese is warmer too. Stuff your peppers until the meat mixture is poking out a bit. Take your bacon and wrap one piece around the jalapeno and secure it with the tooth pick. Now this may sound easy, but when you have cream cheese mixture on peppers and gloves, then bacon in the mix it can get tricky. I try to get the tooth pick through the start and end of the bacon piece. Then cook until bacon is done, I like it grilled. This is the part I wish I had taken another picture. They are delicious and spicy, we had some so hot I could barely eat them. How do you use your peppers?
Thursday, September 27, 2012
Super Energy Balls a decent after school snack (kinda)

I am not much for having processed cereals around, but it so happened in the last few months that we needed a quick breakfast on more than one occasion. On the side of the box of Tasteeos is a recipe my boys have asked for me to make repeatedly. I finally made it and its actually good. Here is the recipe on the box:
Super Energy Balls
1 cup of peanut butter
2 tbsp melted butter
1/2 cup of honey
1/2 cup non fat dry milk powder
1/2 cup of raisins
2 cups Tasteeos cereal (cheerios like cereal)
1/2 to 2/3 cup flaked coconut
Combine peanut butter, butter, and honey stir well. Stir in milk powder and raisins. Add cereal, stir until evenly coated. Drop 1 tsp mixture into coconut and roll into a ball. Repeat and store in an airtight container in refrigerator.
The box says it makes 5 dozen, well I was lucky to get two dozen. It was hard to finish mixing and I had to use my hands. The coconut didn't want to stick either. I think most of my problems was my peanut butter, its a natural kind and has to be refrigerated. If it was warmer it would have been easier to stir. Even my husband loved these, in fact I made them yesterday and there is 3 sitting in the fridge this morning. My husband even gave me a new idea, to coat them in chocolate. Sounds super healthy right? So I got some almond bark and I am remaking them today.
Update- I am so eating one right now covered in chocolate. I think we have a problem because these rock! I just chopped some almond bark and melted it in my redneck double boiler (aka a steel bowl on top of a pan with boiling water) since we do not have a microwave. I coated the balls and let dry on wax paper. When the chocolate got too cool the coconut fell of more, but otherwise they held together great. These are definately on my remake on special occasion list!

Wednesday, July 18, 2012
Apple Sauce, Apple Butter, Apple Juice Canned

Peels and cores for juice.
When you get the desired amount of apples cut and peeled, just pour out the water and add new to cook. I kept the water line about half way up the apples for the sauce/butter and cover the peels with water for the juice. Now you can cook the apples for about 20 minutes or until they are soft, on high, I cook the juice pieces on low for a while until they fall apart. I take the easy route on the pureeing part, I use my potato masher and squish it up. If you like it chunky then don't squish so much, or do it more for smoother texture. If you still don't like the texture you can always let it cool and blend it. At this point you have apple sauce. I add sugar to taste, I really don't have a recipe. For me it depends on the sweetness of the apples and who intends to eat it. I make it a little sweeter for my kids and a little less sweet for my Grandpa. If you want to keep it as apple sauce return it to a good boil and can it from here. Leave a 1/2" head space, remove air bubbles and process for 20 minutes in boiling water canner. If you want apple butter and some spices to the mashed up apples. I detest cloves, so I make mine with cinnamon and nutmeg. I just add these to taste and then I cook it a few minutes and taste it again. When you get the taste right turn it down to low and let it cook for a bit. Stir it often, and when it mounds up on a spoon it is ready to can. How long does this take? It depends on how much water you added to the apples when you first cooked and how much sugar you added too.
Mounded up on spoon.
When the apple butter is cooked down, it is ready to can. Leave a 1/4" head space and process for 10 minutes in a boiling water canner. Now your juice pan has been cooking away this whole time, turn it off and let it cool. When cooled a bit, strain it through cheese cloth, or a clean dish towel. Discard the peels and cores and the leftover is your juice. If you are going to can it heat it back up, then ladle it into your jars leaving a 1/4" head space and process for 10 minutes in a boiling water canner. You can get so much out of apples and your house smells great too. I hope you have fun with them.
Wednesday, July 11, 2012
Oreo Pie
If you have never made oreo pie you are missing out on something tasty, unless you hate oreos. I make mine as simple as possible. I remember reading the recipe years ago and I forgot where I found it. Here is how I make it:
Oreo Pie
1 package of oreo's
butter
2 packages of chocolate pudding powder mix
cool whip or whipped heavy cream
2 cups of milk
If you don't want to mess with making a crust they sell pre-made oreo crusts at most grocery stores. If you want to make it crush up or chop all the cookies, but leave two out. Melt some butter and mix it with the crushed oreos until in will stick together when pressed. Press it into a pie pan until a nice crust is formed and bake for about 10 minutes so it will set. Mix pudding packages with 2 cups of milk and mix well. Pour half of the pudding mixture into the pie crust and spread it out evenly. mix the rest of the pudding mixture left in the bowl with half of the whipped cream or cool whip. (You don't have to whip it until it has super stiff peaks) Pour this mixture into the pie pan on top of the first pudding. You will now have two different colors in your pie.

This is the second layer.
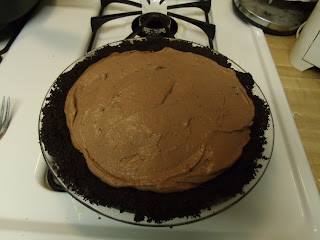
I didn't use all the second mixture of pudding in the pie, I just didn't have enough room. So the kids ate it, lol. Take the rest of the whipped cream or cool whip and put it on top, I usually take the time to cover all the chocolate. Then take the two leftover cookies and rub them together over the top of the pie, it makes cute little sprinkles. Be sure and let it chill a bit before serving!

Finished pie!
Wednesday, June 27, 2012
Making Stew Vs Buying at the Store
I was wondering if it was economical for me to make and pressure can my own stew or buy it at the store. First thing I did was take in mind that I feed 2 adults, 1 teenager, 2 under 10 and a baby every night. So I like things cheap. Second is, I like it healthy and to me when I look at a label on a can I like it to say things I can pronounce. Not to mention what was the can coated with? I know some canning lids contain BPA, but when I look at the entire can vs the lid being coated in it I choose the latter. I was going on a normal grocery store run yesterday and found meat on sale. I got some, and a light went off in my head. What if I could make a quick and easy meal for us when school and scouts start and things get crazy around here. I scounged around in my recipe books until I found this recipe. I also looked around and realized I already had some things at home. Like salt, thyme, pepper and onions from the garden. I went back to the store to get the rest and I wrote down prices so I could compare. Here is the break down of the food:
Meat $11.00
Potato $ 1.88
Celery $ 1.39
Carrots $ 1.98
Onions $ 1.19lb (I got the price to show you)
Jars $ 9.00 (This is a guess)
I didn't add in the seasoning, because thats getting a little crazy. The jars come in 12 packs so I divided that and it comes up to about $.75 a jar. When I made this I actually got 9 quarts instead of 7, this may not happen for everyone. This takes my total to $23.00 for 9 quarts of beef stew or $2.56 each. If you needed to add onions that would be $24.19 or $2.69 each, if your onions only weigh a pound and you get 9 quarts. When you look at whats in the store most come in 16 oz. sizes which is a 1/2 quart. I looked on amazon for Dinty Moore Beef Stew and it is a 15 oz. can for $2.95 each. I haven't looked in local stores yet. To make one quart of Dinty Moore it would take slightly over two cans of it, I will just use two for this purpose. It would cost $5.90 for two cans of theirs and $2.56 for a quart of mine. Yes it cost time for me, but I like doing stuff like that. I also like to show off stuff I make, call me vain its ok. I looked on amazon for the price of jars and its way higher than what I can find locally. Im sticking with my $9.00 for right now, next time I go to the store Ill get the correct price for yall. All in all it was so worth it for me to make this and Im going to start making more stuff like this. Would it be economical for you to can stew?
Thursday, June 21, 2012
Fresh Apple Cake
This recipe comes from a cook book my Mom got at a garage sale for me years ago. The book was made in the 50's in Dallas, Tx. I wish I had the name of the book, but it ripped off long ago and got lost. This recipe also goes well with pears.
Fresh Apple Cake
3 cups apples, chopped fine
2 cups sugar
2 eggs
1 cup wesson oil
3 cups sifted flour
1 1/2 tsp baking soda
1/2 tsp salt
1 tsp vanilla
1 cup chopped pecans, more if you like a lot of nuts
Cover chopped apples with sugar and let stand 20 minutes. In a large mixing bowl mix eggs and oil thoroughly. Add sifted dry ingredients alternately with apple mixture. Add vanilla and nuts and mix thoroughly. Batter will be thick. Pour into greased and floured tube cake pan and bake at 325 degrees for one hour or until well done. Remove from pan immediately. Really a delicious cake which keeps well as it is a moist cake.
Lorena Peterson
Monday, June 18, 2012
Justin Wilson's Pickled Okra

I don't know how many of ya'll remember Justin Wilson. He was a great chef and had a tv show for some time. My Mom has his recipe book and every Thanksgiving it is our custom to make his turkey gumbo with the turkey. That book is awesome and my favorite pickled okra recipe is in it too. Again, It doesn't contain exact processing times, but it makes the best pickled okra.
Justin Wilson's Pickled Okra
20 fresh small okra (or as many as needed)
1 tsp salt per quart jar or 1/2 tsp salt per pint jar
4 hot peppers, whole or chopped
1 clove of garlic, cut in 8 pieces
3 parts white vinegar
1 part water
Put okra into two sterilized jars, add salt, hot peppers, and 3 or 4 pieces of garlic, depending on how much you like garlic. In a medium sized sauce pan mix the vinegar and water together, then heat slowly. Don't bring to a boil. Stir the liquid with your finger, when it gets too hot to keep your finger in its ready. Pour into jars, making sure to cover the okra completely and seal with sterilize lids, following the manufacturer's directions. Let set for one or two weeks before using.
For us i can it in pint jars, so I know we use it all before it goes bad. I process it in a boiling water canner for 15 minutes. I also wait two weeks before using, which is very hard sometimes. Also I cut a slit in my peppers, at least two per pepper down the sides, instead of chopping them. Just in case you have never watched his show, here is an episode.
Friday, June 15, 2012
Older Canning and Cooking Recipes
I have several books with older canning recipes in them and recipes for cooking. I am going to start sharing them with you. Keep in mind that sometimes they didn't add processing times and I may not know them. You can look up processing times in various places online. Here is one place that seems to have some good info. This one has some great pictures. If you are concerned about processing it you can always keep it in the fridge and use it soon. Also note that older recipes don't state to prepare the fruit or vegetable, like peeling, deseeding and such. If I catch it I will add it in. Here is the first recipe:
Pickled Sweet Peppers
1 cup vinegar
1 cup water
1 tsp salt
Boil these items. Cut peppers up into strips and have jars washed and dry. Put 2 garlic cloves and 1 jalepeno in each jar. Pack sweet peppers in jars and pour cooled liquid in it. Put a tablespoon of olive oil in each jar and seal up. Process for 10 minutes in a water canner. (Ball book states to pressure can bell peppers.)
Monday, June 4, 2012
Mulching
Mulching is like gardening, its as easy and as cheap as you make it. You don't have to spend a lot of money to mulch or grow things. But its very easy to spend money on things you think you need. I tend to go the cheap route, I look around the house for things I have that might work. Newspaper is one of my main things. I also have an abundance of homework and cute little drawings my boys bring home. They really like to shred these and I store them until needed, just don't use anything glossy. The same goes for the newspaper, don't use glossy paper. I also use cardboard, again stay away from glossy. Why not use the glossy paper? It releases toxins into the ground as it decomposes. I also use straw or hay, you really do have to be careful here and make sure they didn't treat it with pesticides or herbicides. That would suck to have a beautiful garden and mulch it only to watch it die. So a quick run down of what I use in our garden.
On Bottom:
1. Non-glossy newspaper
2. Cardboard
On Top:
3. Hay or straw
4. Shredded paper
Using Newspaper
To make it weed free longer you need to use thicker stuff. I use newspaper six pages thick and over lapped, then I cover it with shredded paper or hay to hold it down. (Note, if doing the mulching on a windy day you will have this stuff all over your yard. I know trust me.) When going around the plants I rip good size tears in the paper so it can get close, but not damage the plant.

Be careful around plants
I forgot to mention I run a soaker hose under the newspaper when I make it this thick. It tends to block rain from getting through for a while too. Of course I didn't think to take a picture of this. If you don't have a soaker hose make a ring of dirt about 3 to 4 inches away from and around the plant, and do not cover this up with newspaper. Instead water the plant in this "water holder", it acts like a bowl to hold and collect the water. You can put hay or shredded paper in it for some weed protection.

Shredded paper around Horehound, see the holes where weeds have gotten through?
Using Cardboard
I use cardboard for walkways or for around runner plants, like cucumbers and watermelons. I also use it around squash plants to help with weeds. Basically anything that is a spreading plant and needs room weed free I use cardboard. I never put it up directly at the base though because it blocks water. It is perfect for walkways and areas you don't want weeds. I don't get to use it much since I have a small garden at home, but I do get to use it at the cub scout garden and it works great.
Topping it off
When you get the newspaper or cardboard down wet it well. This helps hold it down and even in a little wind this is very helpful. Then I put my topping on, the shredded paper or hay/straw. When I get this done I wet it again, that stuff likes to blow away even more than the newspaper. I also continue to wet it down a couple of time a week until it sticks to itself. It normally takes a few weeks for this to happen. After that few weeks and things sticking together, you might notice a few holes in your system. Mostly because you will see a few weeds.

Straw that has been patched with shredded paper. It looks weedy, but some of it is garlic.
Also note the soaker hose end, don't forget to leave an access point.
Don't worry though, its an easy fix. I cut or pull out the weed, fix the hole by moving around the newspaper, or add more, and recover with more top mulch. Rewet again as needed in new spots. This usually works well into the summer, until the garden is so big and its so hot that it looks like a jungle. That's about when the mulch is really decomposed by weather and bugs. You will notice a lot of bug life if you peek under the paper. This method is also how I put my garden to bed in the fall. At least that's what I call it. Only I don't leave a soaker hose under it and there are no plants. It encourages worms to stick around and lets them go higher in the soil than if they were out in the yard normally. I even throw some scraps under there sometimes, just in case the worms get hungry. You can leave this down until decomposed and turn it under in the spring, it doesn't hurt. I always notice a darker, richer soil when I keep it on and turn it under the next planting season. Once again I will say you can never be too careful about the hay or straw, where ever you buy it make sure and ask if pesticides or herbicides where used. If you can't afford news papers ask your friends or neighbors what they do with their old ones. Its a great way to recycle. I also look for cardboard at places of business, they are happy to get rid of it. How do you mulch?
Sunday, April 22, 2012
Strawberry Jam Step by Step
Why can? You may ask. Why not? Is what I will say. Its fun for me, kind of like growing a garden. You take something that is one thing and turn it into something completely different. You save the harvest from the summer for those dreary winter months. You make a huge smile on someones face when you share the bounty. I have always been told that my great grandfather ate a half pint of jelly with every meal. Sounds like we would have got along great. Besides, have you looked at the price of jam or jelly with out high fructose corn syrup in it? Its expensive. I can make the same thing at home. The jelly or jam you make in your own kitchen will have fewer ingredients and less pesticides, not to mention a better fresher taste. The tricks to making it easy and run smoothly is to have all your items out and ready to go before you start cooking and have a clean kitchen. I always keep a sink full of hot soapy water too, so I can chunk unused items in it. When the jam or jelly sets up on items its hard to clean. This is going to be going over the water bath method of canning. Here are the items you will need:
1. A water bath canner
2. Jars, lids and rings
3. A large pan, spoon and potato masher
4. A small pan
5. A coffee cup, a canning funnel, a magnet stick, damp rags, and a jar holder
6. Fruit, fresh and firm not rotten or squishy.
7. Sugar
8. Pectin
9. A plate
10. A measuring cup
11. A large bowl
First, clean your jars, even if you are just taking them out of the box for the first time. If you have a dishwasher not only will they be clean, but they will remain hot. If you don't have a dishwasher find a cleaning helper you can fit into the jar.


 Get your canner on the stove and fill it about halfway with water and go ahead and turn it on and put the lid on. Get your other pans on the stove too. In the small pan put some water and flat lids in it. It helps if you flip every other one over so they won't stick together so bad. Make sure you have enough water in the pan to cover the lids and always put more lids in than you need, you never know when one will fly out of you hands. Turn this pan on low, make sure it never boils and put it on a back burner.
 On the front burner put your larger pan that you intend to cook the jam in. Pour some fruit in it and crush it with the potato masher, then scoop it into the measuring cup and pour it into the large bowl until you get the amount needed. Once it is measured you can pour this back into the pan and wash your bowl and measuring cup.

Then measure out the amount of sugar you need in that bowl. Have your sugar bowl ready and waiting by you. Arrange your plate, cup, funnel, magnet stick, spoon, jar holder, and damp rag by your stove.

 Now that you have everything ready to go you can start making jam. First, stir your pectin into your fruit and turn your burner on.
 Stirring slowly and constantly until it reaches a full rolling boil, a boil that will not stop when you stir. Then stir in your sugar and continue to stir until it reaches a full rolling boil. Time your rolling boil for one minute, stirring the entire time. It is important to not scrape the sides of the pan when you are stirring. Then turn your burner off.
 It will build up foam on top, its normal. You can scoop this off with your spoon after you turn the burner off and the bubbles calm down a bit.
 After you scoop the foam off, using your rag, get a jar from the dishwasher. Set it on your plate and put the funnel in the top. Using your coffee cup scoop out some jam and fill the jar up to the rim. Leaving a 1/4 inch head space, the gap between the lid and the jam.
 Wipe the rim with your damp rag, making sure to leave to no particles on the rim. Otherwise it will not make a proper seal.
 Use the magnet stick to get lids out of the hot water and put it on the jar then screw a ring on firmly.
 You may need to use your rag wrapped around the jar for this, they are filled with hot jam. Then take your jar holder and place the jar in the water. Continue this process until all jars are filled.
 Make sure when you have all of your jars in the canner that they have one to two inches of water over their lids. When you are done, put the lid on the canner and let it come to a boil, then time it for 10 minutes. Ajusting the time for high altitude. When the time is up, turn the burner off and wait for the boiling to stop, carefully remove the lid and using your jar holder pick up the jars one at a time. I put a rag under them so I don't drip hot water on my toes. Put them on a towel or heat friendly place to cool. I leave a few inches around each one.


 I usually clean up and have the next batch ready to start when the ones in the canner are done. You can double up a batch, but it may not set properly. It will also not set properly if you use too much or too little sugar or fruit, use a sugar substitute or don't leave it at a rolling boil long enough. You can always check out the Ball website for more info on canning. I have the Blue Book of Preserving and its like my canning dictionary. Here is the website they have a lot of facts. You can make low sugar or no sugar jam by buying a low, no sugar pectin. You can also not use pectin, which I have never done. Or you can use a high pectin fruit in with it, I have never done this either. To me it is easier to use pectin. Here is a recipe that uses tart apples instead of pectin. Here is a page with lots of info too. Canning is fun for me, I hope it is fun for you too. I figure when it becomes work to me instead of fun I'll quit doing it. If I have missed any steps or it just doesn't sound right to you let me know and I'll fix it.
1. A water bath canner
2. Jars, lids and rings
3. A large pan, spoon and potato masher
4. A small pan
5. A coffee cup, a canning funnel, a magnet stick, damp rags, and a jar holder
6. Fruit, fresh and firm not rotten or squishy.
7. Sugar
8. Pectin
9. A plate
10. A measuring cup
11. A large bowl
First, clean your jars, even if you are just taking them out of the box for the first time. If you have a dishwasher not only will they be clean, but they will remain hot. If you don't have a dishwasher find a cleaning helper you can fit into the jar.


Sometimes hands don't fit, and when you rinse them, keep your jars in hot water. As you clean, rub your finger across every jar lid to make sure there are no nicks or cracks, if there are discard that jar.


Then measure out the amount of sugar you need in that bowl. Have your sugar bowl ready and waiting by you. Arrange your plate, cup, funnel, magnet stick, spoon, jar holder, and damp rag by your stove.


Thursday, April 12, 2012
Gardening with Children
Gardening is fun for me, maybe fun for you too, and it can be fun for kids too. Just think of how fun it is to you to plant a tiny seed and watch it grow into a big plant that makes food for you to eat. Kids think that's awesome too. The last two years I have shown cub scouts how to plant seeds and given them tidbits of info about certain plants. Nothing is more entertaining than a bunch of boys asking crazy questions about things in the garden, and they learn about how things grow along the way. I always ask what are the three main things a seed needs to grow into a plant. Most know that it takes water, dirt, and sunlight. What they don't know is that it takes patience and work. They take their tiny cups home after they have planted their seed and put it in the window sill. I tell them to give it sips of water everyday and let me know when it has grown a bit. I have kids come up to me at school saying that their plant has grown and is out of the ground! They get so excited about it, but I do too. Here are some ideas on how to get your kids involved:
1. Have them watch you play in the garden, and let them get dirty too. When we moved into our house several years ago it was the first time we had a yard in several years. It didn't take too long for them to start playing in the dirt. Then the next spring I started planting a garden. My boys had their tiny hoes and shovels and where out there with me. When I was planting something and they were with me I always explained what I was doing, what the plant would make and maybe how we would eat it too. That first summer I constantly caught them digging up the gardens. One day it was hot, I had been working in the garden all day and was tired. I heard them giggling around the corner at another garden spot and I just knew they were tearing it up. When I turned the corner I was shocked to find them standing by the broccoli, happily munching away on it. I just backed up and left them to it. After that year I started letting them pick plants they wanted to grow. I have learned that if they grow it they are more likely to eat it themselves. Without me making them or them sitting at the table for an hour staring at it on their plate.


3. Give them jobs they can do well. My boys like to hoe and find worms to feed the chickens, when they start getting wild with the hoe and swinging it around I have them stop and do something else. They like to water and pull weeds, more so when a fancy or cute watering can is involved. They can also scoop dirt into pots and pick bugs off plants. Mulching is another entertaining job to give to kids.

5. Save your back and let your kids do it. When the veggies or fruit start to grow and are ready to pick kids should be in on that too. You will have less bending over to do and they will have fun picking, especially if its fruit. When we hunt blackberry's my boys are purple mouthed and a little scratched up too, but they are very happy to help. I also get my kids in on preparing the food to eat or can. Children can shuck corn and snap beans. Just make sure you give them age appropriate jobs. One of my boys likes the job of finding worms in the corn and collecting them to feed the chickens or smash in his hands. I wouldn't give a small child a knife to go cut the okra off the stalk with but they can hold the bucket while you drop them in.

1. Have them watch you play in the garden, and let them get dirty too. When we moved into our house several years ago it was the first time we had a yard in several years. It didn't take too long for them to start playing in the dirt. Then the next spring I started planting a garden. My boys had their tiny hoes and shovels and where out there with me. When I was planting something and they were with me I always explained what I was doing, what the plant would make and maybe how we would eat it too. That first summer I constantly caught them digging up the gardens. One day it was hot, I had been working in the garden all day and was tired. I heard them giggling around the corner at another garden spot and I just knew they were tearing it up. When I turned the corner I was shocked to find them standing by the broccoli, happily munching away on it. I just backed up and left them to it. After that year I started letting them pick plants they wanted to grow. I have learned that if they grow it they are more likely to eat it themselves. Without me making them or them sitting at the table for an hour staring at it on their plate.

Here they are writing corn on canning labels and adding the date.

Cosmos, my son picked these out years ago and we save the seeds for the next year.
2. Let them help pick seeds or plants. Since the above story, we have grown sunflowers (which are a big hit for kids), peas, gourds (can't eat but fun to grow), pumpkins, melons and many more items the boys have picked out themselves. Including flowers too, my favorites were mexican sunflowers and orange cosmos, which I still grow the cosmos. Now we have moved on to multi colored popcorn and jelly melons for planting this year. I always try to get them in on the seed buying, and they love planting them too. Don't forget seed saving either, they can collect pods or seeds off of plants too.3. Give them jobs they can do well. My boys like to hoe and find worms to feed the chickens, when they start getting wild with the hoe and swinging it around I have them stop and do something else. They like to water and pull weeds, more so when a fancy or cute watering can is involved. They can also scoop dirt into pots and pick bugs off plants. Mulching is another entertaining job to give to kids.

Digging wild onions up.
4. Let them have their own area or specific plant. This year I have given my boys their own garden spot, which has seeds from the cub scouts planted in it. The food they grow in it is donated to the local mission, I took the first batch of lettuce there the other day. Granted my boys are 8 and 6 and I end up doing a lot of the work in their spot, but when school is out I think I will let them do it all.5. Save your back and let your kids do it. When the veggies or fruit start to grow and are ready to pick kids should be in on that too. You will have less bending over to do and they will have fun picking, especially if its fruit. When we hunt blackberry's my boys are purple mouthed and a little scratched up too, but they are very happy to help. I also get my kids in on preparing the food to eat or can. Children can shuck corn and snap beans. Just make sure you give them age appropriate jobs. One of my boys likes the job of finding worms in the corn and collecting them to feed the chickens or smash in his hands. I wouldn't give a small child a knife to go cut the okra off the stalk with but they can hold the bucket while you drop them in.

My boy getting ready to snap yard long beans last year.
6. Kids can help take the garden down too. In fall we clean are gardens up taking the old plants down and I sprinkle veggie bits on the dirt then we layer newspaper on it and cover it with hay or straw. I call it putting the garden to bed, and my boys help with this too.
lol.
Tuesday, March 27, 2012
Beating the Heat- Saving Spring Plants in Summer Heat
Here in North East Oklahoma it has been quite warm for March. It's been in the 80's for several weeks. While working in the garden yesterday I noticed that one variety of lettuce was bolting. Bolting means that the plant is going to seed.

1. Water often. Try watering in the morning and evening, careful not to get it on leaves during the hottest part of the day. This helps keep the plant cool.
2. Shade netting. I have never tried this, but it sounds promising. I am thinking about using a sheet instead of buying something. Be sure and leave several inches above the plants for air circulation.
3. Mulching. If you have room to mulch around your plants this could be beneficial as it helps hold in moisture. My lettuce plants are much to close for this, I grow them as cut and come again lettuce, not heads.
4. Planting in the shade of another plant. Companion planting is an option. Try putting carrots in the shade of tomato's, or lettuce in the shade of a taller plant. This may not help out at this moment, but it will eventually. In Louise Riotte's book, Carrots Love Tomatoes, she mentions that peas grow well with cucumbers. I do think I will try this one.
What are some of your favorite tricks for saving your plants? Has any of these tips helped you in the past?

This lettuce is bolting, note the long stem and beginning of flower head on top.
It starts, for lettuce, with a long shoot sticking up which will soon bear flowers and a huge amount of seeds. This made me wonder what are some better ways of keeping them cool, especially since it is in full sun. I have several beds around my yard, my old trusty one next to the house only gets a few hours of sun a day. Making it perfect for cool season crops in the heat of summer. Here are some tips to help your plants beat the heat of an early summer, or warm spring. 1. Water often. Try watering in the morning and evening, careful not to get it on leaves during the hottest part of the day. This helps keep the plant cool.
2. Shade netting. I have never tried this, but it sounds promising. I am thinking about using a sheet instead of buying something. Be sure and leave several inches above the plants for air circulation.
3. Mulching. If you have room to mulch around your plants this could be beneficial as it helps hold in moisture. My lettuce plants are much to close for this, I grow them as cut and come again lettuce, not heads.
4. Planting in the shade of another plant. Companion planting is an option. Try putting carrots in the shade of tomato's, or lettuce in the shade of a taller plant. This may not help out at this moment, but it will eventually. In Louise Riotte's book, Carrots Love Tomatoes, she mentions that peas grow well with cucumbers. I do think I will try this one.
What are some of your favorite tricks for saving your plants? Has any of these tips helped you in the past?
Friday, March 23, 2012
No Poo Problems Week 3
First I would like to say sorry I haven't posted lately, been super busy. I was going great with the no poo method of hair care. My hair was awesome, until the day I had to work at my boys spring carnival. I only worked for 30 minutes, but the room was so hot I was sweating. Not a non smelling sweat either. It smelled just like ACV! I wondered if anyone thought I was hording pickles in my pocket. It was terribly embarrassing. Has anyone else ever used the no poo method and then had a problem with the smell? I am at a loss as to what to do, I really liked the baking soda and vinegar rinse. Should I use less ACV? I was doing both every other day. I could really use your opinions, Thanks!
Thursday, March 15, 2012
Homemade Yogurt


Friday, March 9, 2012
Rain Collecting
Does it rain at your house? If so, which I hope it does, do you collect the rain? If you don't your missing out on an opportunity to water your garden with free water. There are several different ways you can collect rain water. You could set a bucket under a spot that gets lots of run off. You could set up a gutter system to direct the flow. You could even string up a tarp with the edges higher than the center and have it connected to a container. Lets don't forget rain barrels, my choice in collecting. I have two, they aren't frilly or anything special. Just some run of the mill kind I got at Atwood's on sale. I didn't even buy them in the same year so I could space out the cost. They were about $60 each.
I was at a farm store the other day and saw some fancy one that had a planter on top and was colored like a clay pot. It was designed for a gutter to be placed above it and was $100. I was shocked at the price. Right next to it was a different one that looked like a barrel but was plastic, also designed for gutter and was almost as much. This got me thinking about how lucky I was that I had spent way less on mine. It also got me to thinking about what everyone else was doing. I spoke to my son's Cub Scout pack on monday evening about gardening and I asked very simple questions about weather they grew things before, if they knew what things a seed needed to grow a fruit or veggie. I also asked if they collected rain to water their garden, only my kids did. They know how fun it is to lug heavy buckets of water around to water their plants. So this made me think more. Do people not know how easy it is or how much money they will save? Do they think they have to put up guttering and ruin their roof, which you don't by the way. So I am here writing this post hoping to give you some ideas on how to save money, time and water. First when you decide you want a rain barrel, it might be a good idea to see if your town allows them. You can read some about this here. I also like to scout areas to see if its applicable to have it their. I don't want it on the flat side a roof where hardly any or no water runs off.


I was at a farm store the other day and saw some fancy one that had a planter on top and was colored like a clay pot. It was designed for a gutter to be placed above it and was $100. I was shocked at the price. Right next to it was a different one that looked like a barrel but was plastic, also designed for gutter and was almost as much. This got me thinking about how lucky I was that I had spent way less on mine. It also got me to thinking about what everyone else was doing. I spoke to my son's Cub Scout pack on monday evening about gardening and I asked very simple questions about weather they grew things before, if they knew what things a seed needed to grow a fruit or veggie. I also asked if they collected rain to water their garden, only my kids did. They know how fun it is to lug heavy buckets of water around to water their plants. So this made me think more. Do people not know how easy it is or how much money they will save? Do they think they have to put up guttering and ruin their roof, which you don't by the way. So I am here writing this post hoping to give you some ideas on how to save money, time and water. First when you decide you want a rain barrel, it might be a good idea to see if your town allows them. You can read some about this here. I also like to scout areas to see if its applicable to have it their. I don't want it on the flat side a roof where hardly any or no water runs off.

Not the best location for a rain barrel, it is flat with the house.
Its also a good idea to take a look at the ground you wish to set it up on. Is it going to be cornered in and let water build up and leak into your garage? I had this problem when I put it in an awesome corner that gets lots of runoff off the house. Because I raised the barrel using cinder blocks leaves and debris built up and blocked the water from being able to go around the barrels base. My chickens are also fond of hiding behind it and trying to make nests, so we are moving it this year. Speaking of raising the barrel, if you want to be able to drain it with ease or hook it to water hose you will need to raise it. It helps gravity along, and remember its not a water spicket like the one attached to your house, you wont have much if any pressure behind the flow. 
The corner of the house has good runoff, making it a great spot for a rain barrel.
This year I am going to raise my main barrel so I can attach it to the hose and spare myself and my children from lugging heavy buckets. Ok so, you have a spot picked out and your debating a barrel type. Don't want to spend all that money on one? No problem, find a store that resales soda barrels. My brothers rain barrel is one, an old mountain dew barrel. All we did was cut the top off and put some mesh over it, attach a spicket at the base and your good to go. Make sure its a food grade barrel please. Now when you find your barrel and decide where to put it, you need to level it a bit. You don't want it falling over in a storm when it should be filling up. I just put a few cinder blocks under it, leveling dirt with a hoe when needed. When its all set up you just need to wait for rain. 
Ready and waiting for rain.
When it does rain, you will probably notice that your barrel it getting a build up of grit from the shingles or dirt from rain or various other things in it that the mesh screen didn't filter out. You do have to clean them out occasionally. I use a little soap and a scrubber, after it is empty and I spray out the muck. I end up doing this about once a year. If you notice you arent using the water fast enough and its turning green and the sides are slimy, you could add small fish. Make sure your barrel is shaded if you do or you will have cooked dead fish. Yes this happend to me, quite nasty. Using the water isnt hard, I fill up my water pail or 5 gallon buckets and go about my business. Other than the periodical cleaning you will want to make sure you protect your barrel from freezing tempuratures. There is no reason to spend the time and money buying it and setting it up if your just going to let it ruin. I clean mine in the fall and put them in my shed. I just brought one out the other day before it rained. I know its a little early, but its so warm this spring. Mine have lasted 2 and 3 years so far and I am hopeing to get much more out of them. I know they have already saved me the amount of money I paid for them. I really hope you learned something from this and maybe decided to get a rain barrel or not. If you have anymore ideas, please share them.
Wednesday, March 7, 2012
No Poo Week 2
I am still loving the no poo, Ill admit though, I thought I was going to have to shampoo my hair the other day. I used coconut oil on the tips because my hair was dry and had static cling bad. I had never done this before, so I just dipped my fingers in some oil and rubbed it in. Well, that was a little, ok a lot more oil than my hair could handle. I of course didnt notice, I did it in the kitchen while I was baking. I just put my hair up and went about baking for an hour then went and no poo'd as normal. I waited and waited for my hair to dry, seemed like it took a long time. Then I noticed it looked darker where the oil was, and then I noticed it was really dry, the oil just made it look wet. Oh no! I couldnt rebaking soda it, I was stuck, so I waited it out and wore my hair in a bun for two days until I could wash it again. It looked horribly greasy, but now its pretty awesome and I will know better next time about the oil. Are you trying or have you ever tried no poo? How did it work for you?
Monday, March 5, 2012
Homemade Granola
Homemade granola sounds hard or at least it did to me, until I tried it. I love it, its so easy to make, delicious and healthy. As a bonus this could very easily be made gluten free, if you buy certified gluten free products. My first attempt ended in a slightly burnt granola, but good never the less. Oh and the prunes I put in it where rock hard and had to be picked out. I don't have a fancy pan to make it in, just a plain old cake pan. Here is the original recipe I used http://www.foodnetwork.com/recipes/ina-garten/cherry-almond-and-cinnamon-granola-recipe/index.html I didn't have cherry's, so I used diced prunes, which are awesome. I was worried when buying what I needed that the almonds would be expensive. They are, but if you buy whole almonds and chop them yourself you save a couple of bucks. One bag of whole almonds made two batches of granola for me. I tried chopping them in my food processor and in my coffee grinder like I did the flax seed. Yeah I had huge chunks and almond flour at the same time. So out came the cutting board. I can't seem to not tweak recipes, so here is my version of granola. I hope you have better luck with your first batch than I did.

Flax Seed Granola
4 cups rolled oats
2 cups sweetened coconut flakes
2 cups chopped almonds (cheaper than sliced)
1 cup coarsely ground flax seeds
1/2 cup coconut oil
1/3 cup honey
2 tsp cinnamon
2 tbsp nutritional yeast
Preheat oven to 350. Mix the first 4 ingredients in a large bowl. Mix the oil and honey together and pour on the dry ingredients, mixing well. It takes a fair amount of mixing. Sprinkle cinnamon and yeast on top. Mix well, again this takes a bit of stirring. Bake in cake pan or whatever pan works. When you baking stir it often, like every 5 minutes or so. I flatten it back out when I do so it cooks more evenly. Bake it until it is a nice golden brown. Let it cool stirring occasionally. I stored mine in mason jars and it lasted several weeks. Makes a great bowl of cereal and my boys liked it. Sorry I haven't perfected putting fruit in it yet, but you can always sprinkle it on top. Its also very good in yogurt, come to think of it I need to make more yogurt now that I have made more granola.


This is before adding oil and honey.
Flax Seed Granola
4 cups rolled oats
2 cups sweetened coconut flakes
2 cups chopped almonds (cheaper than sliced)
1 cup coarsely ground flax seeds
1/2 cup coconut oil
1/3 cup honey
2 tsp cinnamon
2 tbsp nutritional yeast
Preheat oven to 350. Mix the first 4 ingredients in a large bowl. Mix the oil and honey together and pour on the dry ingredients, mixing well. It takes a fair amount of mixing. Sprinkle cinnamon and yeast on top. Mix well, again this takes a bit of stirring. Bake in cake pan or whatever pan works. When you baking stir it often, like every 5 minutes or so. I flatten it back out when I do so it cooks more evenly. Bake it until it is a nice golden brown. Let it cool stirring occasionally. I stored mine in mason jars and it lasted several weeks. Makes a great bowl of cereal and my boys liked it. Sorry I haven't perfected putting fruit in it yet, but you can always sprinkle it on top. Its also very good in yogurt, come to think of it I need to make more yogurt now that I have made more granola.

Just placed in the oven.

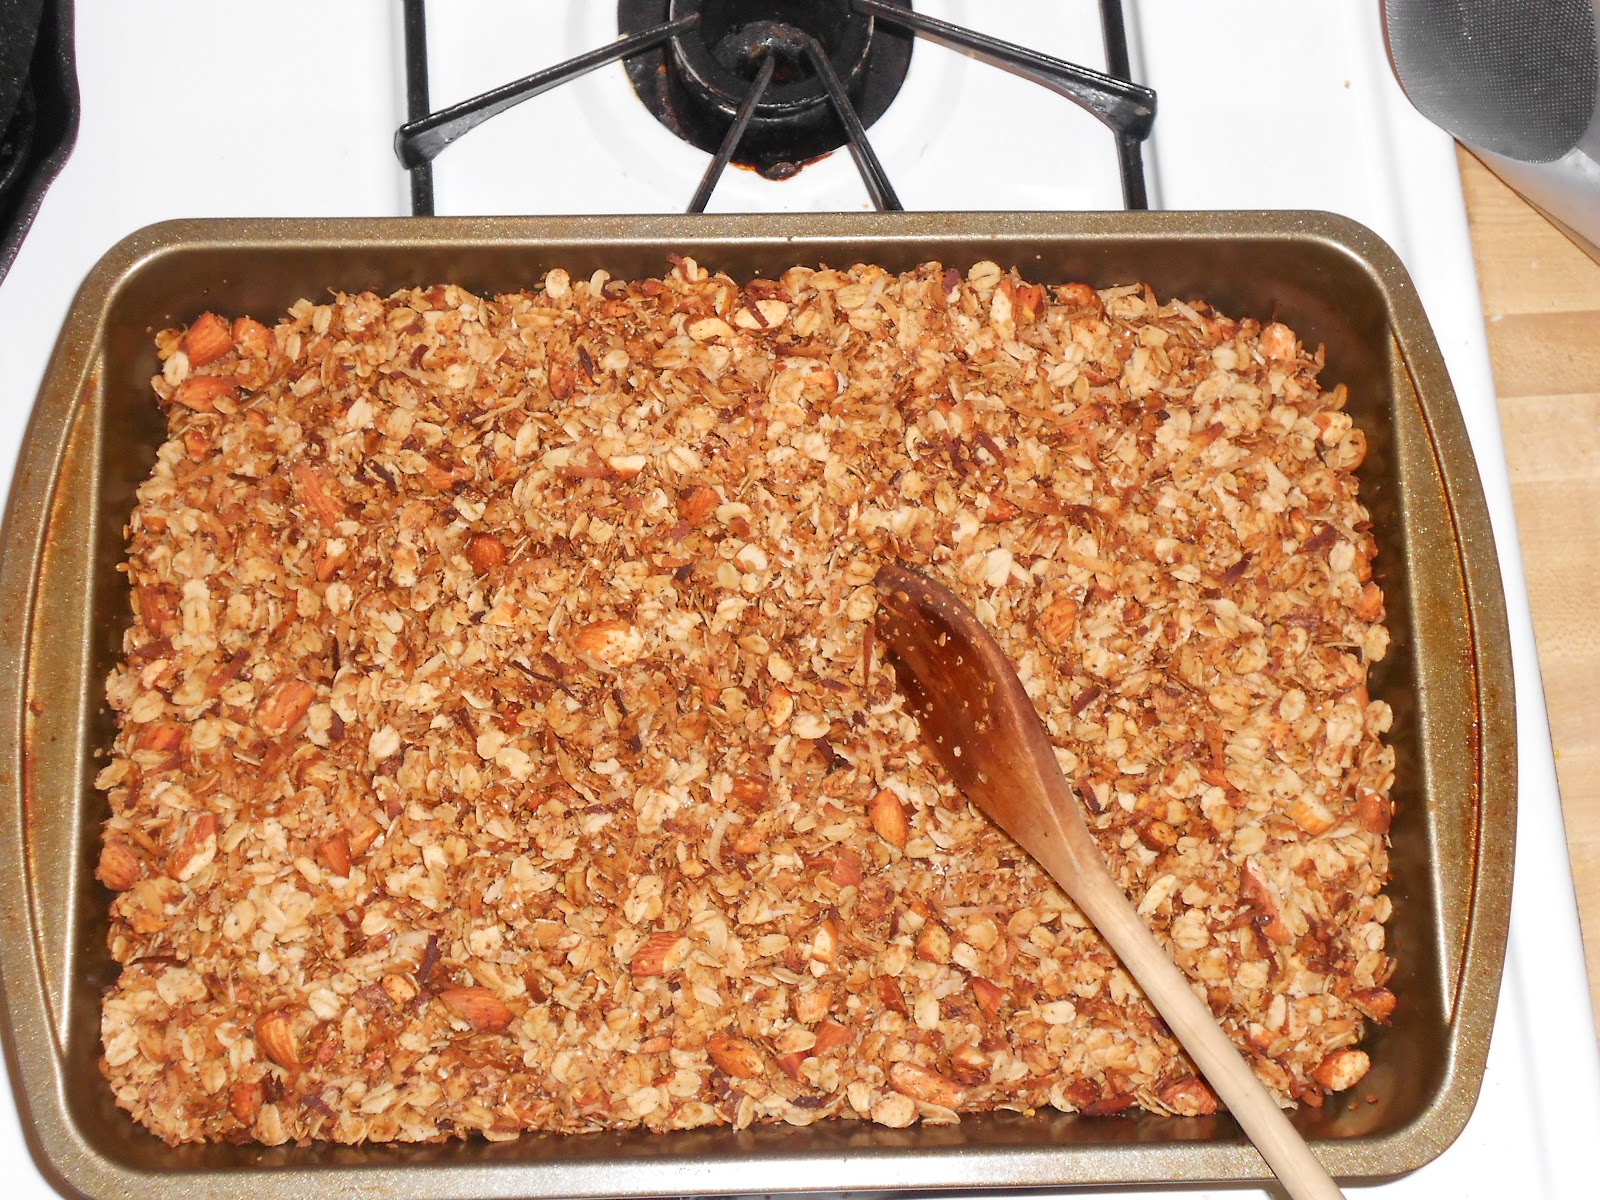
All done, kind of hard to tell the difference in the pictures, but its done I promise.
Subscribe to:
Posts (Atom)