Monday, October 29, 2012

Halloween fun


I made a two different treats for the cake walk at cub scouts. I made spider web cupcakes and finger cookies. To make the cupcakes I used a regular box cake mix and frosting. I baked it according to the directions on the box. When cooled I frosted them lightly, mostly just enough to cover the cake.
Make sure you smooth it out kind of good. Then take some of your frosting and put it in a bowl and mix it with black food coloring until it is the desired color.
Put this colored frosting into a piping bag or a zip lock bag I grab the corner I want to cut and push it through the inside of the bag, and fill my hand up with frosting. Then I pull my hand back through and the frosting is just in the corner and not all over the bag.
I could not get a good picture of the frosting in my hand since I was taking the picture myself. Next clip a tiny, tiny piece off the corner of the bag. With your piping bag make a small circle in the center of the cake and a bigger circle around it.
I only do a few cupcakes at a time, because I get bored easy and I need to keep changing what I am doing. Anyway, once you get some done you will need a toothpick or in a pinch a skewer. I hadn't realized we were out of toothpicks until it was too late. Next take your toothpick and start at the center line drag the toothpick through the black icing connecting the lines and going past the outer line. I usually make 5 or 6 lines on each cupcake.
This is when I realized I had made the lines too thick. I had to use the other corner of my bag and make the hole smaller. Next after the web is made you take an m&m and put it some where on the web. Using the black icing make little legs off the sides of the candy.

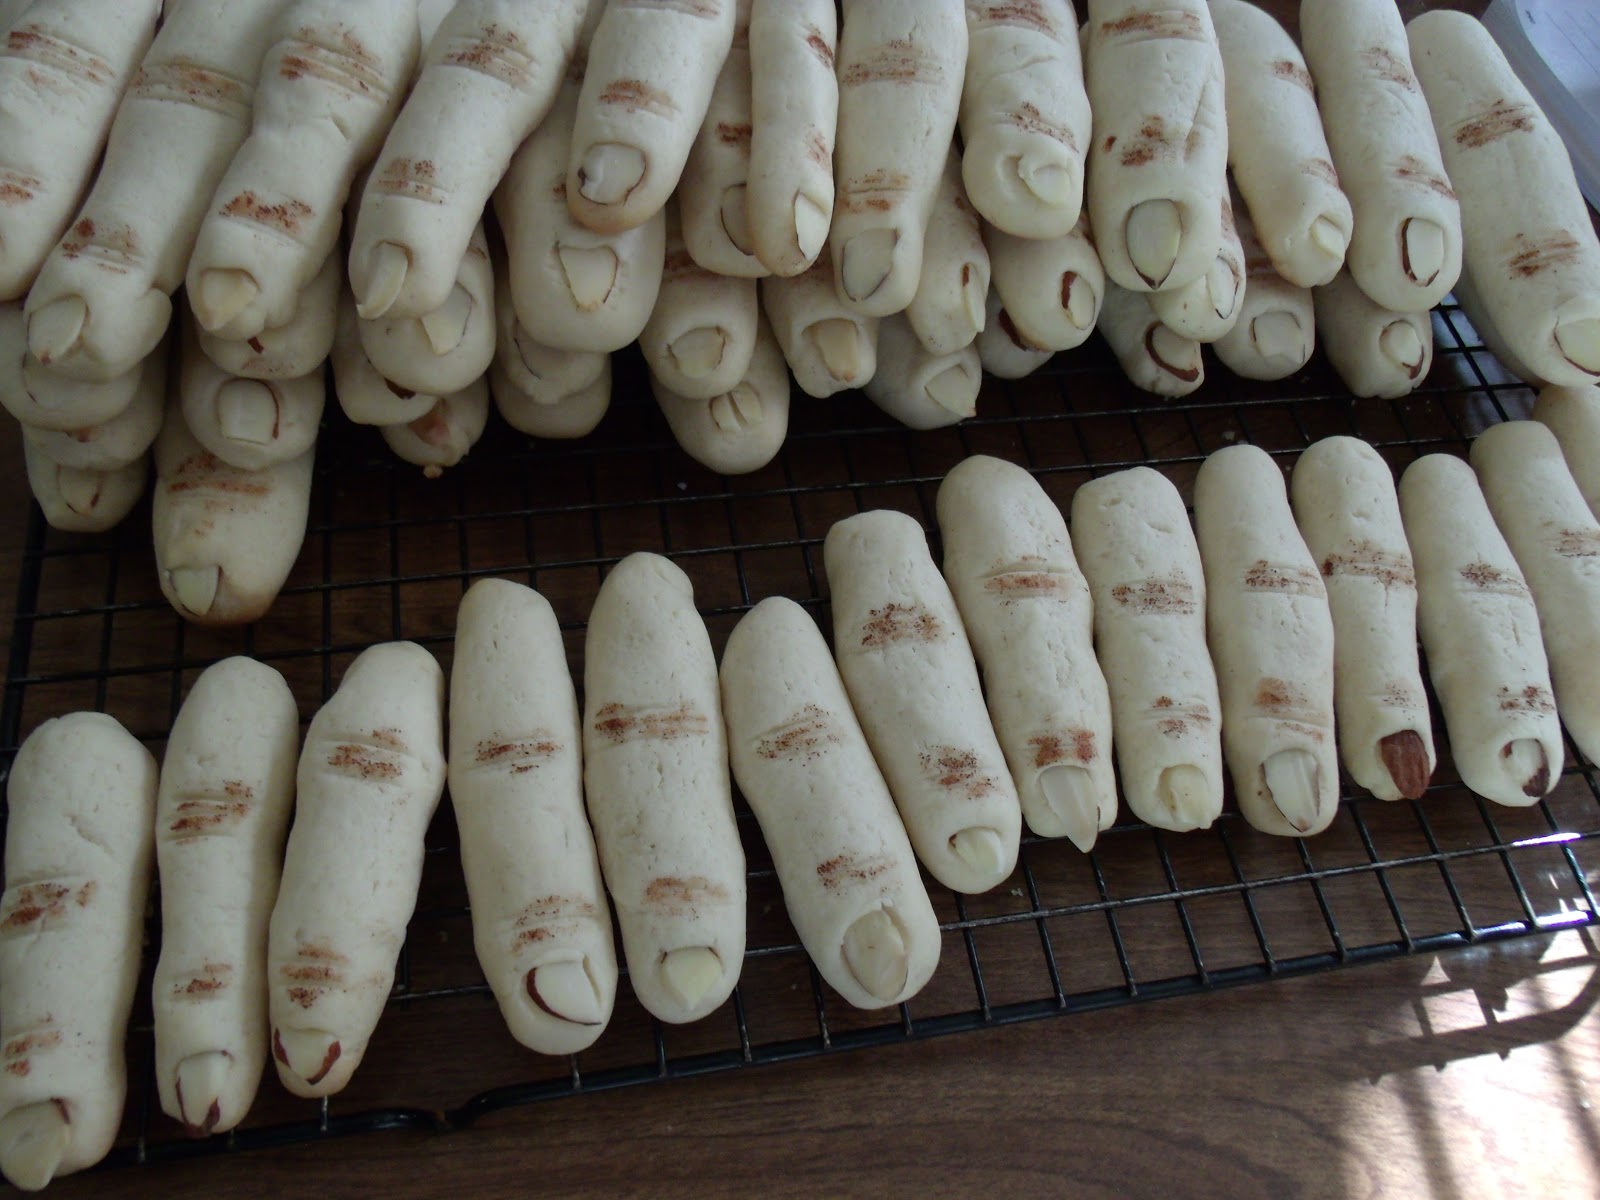
Next up we made sugar cookie fingers. I used the same recipe I have used before and you can find it here. After the cookies chilled we rolled them out like a snake and used sliced almonds to make finger nails. I used a butter knife to make the slits on the knuckles. After the first pan was out of the oven we realized we used too much dough. Our cool fingers turned into fat fingers. So we made them skinny almost boney looking and they turned out better.
 
I also dusted cinnamon over the slits, they look pretty awesome and I hope the boys like them at scouts. Whats your favorite halloween treat?


Tuesday, October 9, 2012

Stuffed Jalapenos

I love spicy food, so much that I grow at least two jalapeno plants every year. I love tabasco peppers too, oh and banana peppers. Anyway, before an impending frost I picked and the large ones. I have been letting them get to a big enough size so we could stuff them. The recipe I use is simple and I don't know who originated it, it was told to me a long time ago. I didn't get as many pictures as I'd like, but I got the one that show how to cut them. Always make sure you wear gloves, and I recommend a well ventilated area too. These were so spicy just cutting and de-seeding made me cough.
Stuffed Jalapenos:
Ground meat- cooked, drained, and cooled slightly
Cream cheese- warmed up a bit
Bacon
Jalapenos
Toothpicks
I didn't put an amount because it all depends on how many jalapenos you get. We had about 14 or so and used a pound of ground meat, one package of cream cheese and two packages of bacon. Rinse the jalapenos cut a slit down the center length wise, not cutting through the pepper. Make a horizontal slit at the top and bottom of vertical slit, making sure not to cut through the pepper again. Its ok if you accidentally chop through it, you can finagle it and wrap the bacon so it holds on most occasions. Gently pull your sides open and cut out seeds and membranes, or leave them in up to you. You get more stuffing in without it though.
Cut open and ready to stuff.
This is the only picture I got, but it shows you how I cut mine open. Ok once you have them cut open I rinse to get out any extra seeds that may be hiding. Mix your cream cheese and browned ground meat until smooth. It works best if meat is warm and cream cheese is warmer too. Stuff your peppers until the meat mixture is poking out a bit. Take your bacon and wrap one piece around the jalapeno and secure it with the tooth pick. Now this may sound easy, but when you have cream cheese mixture on peppers and gloves, then bacon in the mix it can get tricky. I try to get the tooth pick through the start and end of the bacon piece. Then cook until bacon is done, I like it grilled. This is the part I wish I had taken another picture. They are delicious and spicy, we had some so hot I could barely eat them. How do you use your peppers?

Thursday, September 27, 2012

Super Energy Balls a decent after school snack (kinda)


I am not much for having processed cereals around, but it so happened in the last few months that we needed a quick breakfast on more than one occasion. On the side of the box of Tasteeos is a recipe my boys have asked for me to make repeatedly. I finally made it and its actually good. Here is the recipe on the box:
Super Energy Balls
1 cup of peanut butter
2 tbsp melted butter
1/2 cup of honey
1/2 cup non fat dry milk powder
1/2 cup of raisins
2 cups Tasteeos cereal (cheerios like cereal)
1/2 to 2/3 cup flaked coconut
Combine peanut butter, butter, and honey stir well. Stir in milk powder and raisins. Add cereal, stir until evenly coated. Drop 1 tsp mixture into coconut and roll into a ball. Repeat and store in an airtight container in refrigerator.
The box says it makes 5 dozen, well I was lucky to get two dozen. It was hard to finish mixing and I had to use my hands. The coconut didn't want to stick either. I think most of my problems was my peanut butter, its a natural kind and has to be refrigerated. If it was warmer it would have been easier to stir. Even my husband loved these, in fact I made them yesterday and there is 3 sitting in the fridge this morning. My husband even gave me a new idea, to coat them in chocolate. Sounds super healthy right? So I got some almond bark and I am remaking them today.
 Update- I am so eating one right now covered in chocolate. I think we have a problem because these rock! I just chopped some almond bark and melted it in my redneck double boiler (aka a steel bowl on top of a pan with boiling water) since we do not have a microwave. I coated the balls and let dry on wax paper. When the chocolate got too cool the coconut fell of more, but otherwise they held together great. These are definately on my remake on special occasion list!

Wednesday, July 18, 2012

Apple Sauce, Apple Butter, Apple Juice Canned

We love apples here, I love the season. I usually think of fall when I think of apples, but a friends tree had some ripe and she shared with me. It was about a walmart bag and a half full. So I got up and got the apple master out, if you don't have one and do a lot of apples its something you may consider looking into. Here is what it is, if you don't know. I love that thing! The baby only let me do so much this morning, but I got my large stock pot about half full. When you do apples don't throw away the peel and cores, put it in another pan and make juice from it. When peeling my apples I keep them in the intended pan and fill it halfway with water, I add lemon juice to keep them from browning, I also did this in my juice pan.
Peels and cores for juice.
When you get the desired amount of apples cut and peeled, just pour out the water and add new to cook. I kept the water line about half way up the apples for the sauce/butter and cover the peels with water for the juice. Now you can cook the apples for about 20 minutes or until they are soft, on high, I cook the juice pieces on low for a while until they fall apart. I take the easy route on the pureeing part, I use my potato masher and squish it up. If you like it chunky then don't squish so much, or do it more for smoother texture. If you still don't like the texture you can always let it cool and blend it. At this point you have apple sauce. I add sugar to taste, I really don't have a recipe. For me it depends on the sweetness of the apples and who intends to eat it. I make it a little sweeter for my kids and a little less sweet for my Grandpa. If you want to keep it as apple sauce return it to a good boil and can it from here. Leave a 1/2" head space, remove air bubbles and process for 20 minutes in boiling water canner. If you want apple butter and some spices to the mashed up apples. I detest cloves, so I make mine with cinnamon and nutmeg. I just add these to taste and then I cook it a few minutes and taste it again. When you get the taste right turn it down to low and let it cook for a bit. Stir it often, and when it mounds up on a spoon it is ready to can. How long does this take? It depends on how much water you added to the apples when you first cooked and how much sugar you added too.
Mounded up on spoon.
When the apple butter is cooked down, it is ready to can.  Leave a 1/4" head space and process for 10 minutes in a boiling water canner. Now your juice pan has been cooking away this whole time, turn it off and let it cool. When cooled a bit, strain it through cheese cloth, or a clean dish towel. Discard the peels and cores and the leftover is your juice. If you are going to can it heat it back up, then ladle it into your jars leaving a 1/4" head space and process for 10 minutes in a boiling water canner. You can get so much out of apples and your house smells great too. I hope you have fun with them.


Wednesday, July 11, 2012

Oreo Pie

If you have never made oreo pie you are missing out on something tasty, unless you hate oreos. I make mine as simple as possible. I remember reading the recipe years ago and I forgot where I found it. Here is how I make it:
Oreo Pie
1 package of oreo's
butter
2 packages of chocolate pudding powder mix
cool whip or whipped heavy cream
2 cups of milk
If you don't want to mess with making a crust they sell pre-made oreo crusts at most grocery stores. If you want to make it crush up or chop all the cookies, but leave two out. Melt some butter and mix it with the crushed oreos until in will stick together when pressed. Press it into a pie pan until a nice crust is formed and bake for about 10 minutes so it will set. Mix pudding packages with 2 cups of milk and mix well. Pour half of the pudding mixture into the pie crust and spread it out evenly. mix the rest of the pudding mixture left in the bowl with half of the whipped cream or cool whip. (You don't have to whip it until it has super stiff peaks) Pour this mixture into the pie pan on top of the first pudding. You will now have two different colors in your pie.
This is the second layer.
I didn't use all the second mixture of pudding in the pie, I just didn't have enough room. So the kids ate it, lol. Take the rest of the whipped cream or cool whip and put it on top, I usually take the time to cover all the chocolate. Then take the two leftover cookies and rub them together over the top of the pie, it makes cute little sprinkles. Be sure and let it chill a bit before serving!
Finished pie!

Wednesday, June 27, 2012

Making Stew Vs Buying at the Store

I was wondering if it was economical for me to make and pressure can my own stew or buy it at the store. First thing I did was take in mind that I feed 2 adults, 1 teenager, 2 under 10 and a baby every night. So I like things cheap. Second is, I like it healthy and to me when I look at a label on a can I like it to say things I can pronounce. Not to mention what was the can coated with? I know some canning lids contain BPA, but when I look at the entire can vs the lid being coated in it I choose the latter. I was going on a normal grocery store run yesterday and found meat on sale. I got some, and a light went off in my head. What if I could make a quick and easy meal for us when school and scouts start and things get crazy around here. I scounged around in my recipe books until I found this recipe. I also looked around and realized I already had some things at home. Like salt, thyme, pepper and onions from the garden. I went back to the store to get the rest and I wrote down prices so I could compare. Here is the break down of the food:
Meat      $11.00
Potato     $ 1.88
Celery    $ 1.39
Carrots   $ 1.98
Onions   $ 1.19lb (I got the price to show you)
Jars         $ 9.00 (This is a guess)
I didn't add in the seasoning, because thats getting a little crazy. The jars come in 12 packs so I divided that and it comes up to about $.75 a jar. When I made this I actually got 9 quarts instead of 7, this may not happen for everyone. This takes my total to $23.00 for 9 quarts of beef stew or $2.56 each. If you needed to add onions that would be $24.19 or $2.69 each, if your onions only weigh a pound and you get 9 quarts. When you look at whats in the store most come in 16 oz. sizes which is a 1/2 quart. I looked on amazon for Dinty Moore Beef Stew and it is a 15 oz. can for $2.95 each. I haven't looked in local stores yet. To make one quart of Dinty Moore it would take slightly over two cans of it, I will just use two for this purpose. It would cost $5.90 for two cans of theirs and $2.56 for a quart of mine. Yes it cost time for me, but I like doing stuff like that. I also like to show off stuff I make, call me vain its ok. I looked on amazon for the price of jars and its way higher than what I can find locally. Im sticking with my $9.00 for right now, next time I go to the store Ill get the correct price for yall. All in all it was so worth it for me to make this and Im going to start making more stuff like this. Would it be economical for you to can stew?

Thursday, June 21, 2012

Fresh Apple Cake

This recipe comes from a cook book my Mom got at a garage sale for me years ago. The book was made in the 50's in Dallas, Tx.  I wish I had the name of the book, but it ripped off long ago and got lost. This recipe also goes well with pears.
Fresh Apple Cake
3 cups apples, chopped fine
2 cups sugar
2 eggs
1 cup wesson oil
3 cups sifted flour
1 1/2 tsp baking soda
1/2 tsp salt
1 tsp vanilla
1 cup chopped pecans, more if you like a lot of nuts
Cover chopped apples with sugar and let stand 20 minutes. In a large mixing bowl mix eggs and oil thoroughly. Add sifted dry ingredients alternately with apple mixture. Add vanilla and nuts and mix thoroughly. Batter will be thick. Pour into greased and floured tube cake pan and bake at 325 degrees for one hour or until well done. Remove from pan immediately. Really a delicious cake which keeps well as it is a moist cake.
 Lorena Peterson